Starting out in photogrammetry I needed to study GNSS receivers, RTK and PPK processing, and ground control points. This is a considerable learning curve – and expense.
My learning curve began when I connected a M8N receiver (Beitian BN-880) to a Seagull geotag logger. (#MAP-02) This exercise required me to learn the uBlox utility U-Center and use an FDTI cable to update parameters on the BN-880 to make it work properly with the #MAP-02. Knowledge of these tools was invaluable in creating a DIY GNSS Rover for GCP’s – which also led to making a good receiver for a Mission Planner RTK base.
A professional grade GNSS receiver for marking ground control points can cost over $10,000. Sets of two “consumer grade” GNSS receivers used for PPK marking of ground control points can cost $5,000. Fortunately, there are now suitable products for less. Emlid offers a single-channel GNSS receiver for $800. This cost excludes items such as a prism pole, bi-pod, software and cell phone. This $800 product likely does as good a job for typical photogrammetry ground control marking as the $2500 dual-channel Emlid receiver many of my colleagues use.
Where Ntrip caster services are available, only one GNSS receiver is required for RTK marking of ground control points. Without an Ntrip caster, two GNSS receivers are required for PPK marking of ground control points. Some states offer free Ntrip caster services – mine does not. But at $50 per day, the available commercial Ntrip caster service here is OK for testing and occasional use.
There are also new technologies I’ve yet to explore. Satellite based corrections for precision positioning are now available. Two are PPP and PPP-RTK. While these alternate correction methods have tradeoffs, they promise some real advantages. Click here for a reference.
A DIY approach can have additional responsibilities. For example, GNSS antennas can be “calibrated” – and there is a NOAA website that has calibration files for common commercially available GNSS receivers. Click here for a reference. For my project I did not calibrate my antenna because my receiver doesn’t support it. Without this, there is a decrease of accuracy by maybe a few centimeters.
Any RTK capable uBlox generation 8 or generation 9 GNSS receiver can be used as an RTK rover for marking ground control points using Ntrip. For now I’m using a commercial Ntrip service – but I may establish my own Ntrip caster in the future. Or I may skip that and implement a PPP-RTK receiver. A lot depends on the accuracy required by my photogrammetry clients.
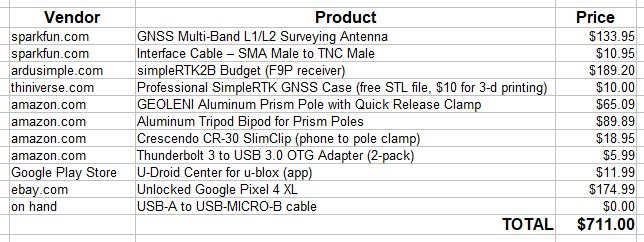
Here is my complete parts shopping list for the DIY GNSS Rover for GCP’s I decided to make:
I ordered the ArduSimple simpleRTK2B Zed F9P product because it included many connection options – useful for future applications. In particular, it includes a pixhawk connection – in case I ever decide to mount it in a vehicle. So far I’ve only needed to use two connections – the micro-B USB connection, and the SMA antenna connection.
I found an STL file on thingiverse.com for 3-D printing a nice case for the receiver. My local 3-D printer has a minimum order charge of $30 – which covered printing three of them.

It’s commonly recommended to update any uBlox receiver to the latest available firmware. This is easily accomplished with this receiver. It requires the uBlox U-Center utility and a USB cable.
Click here for a beginner’s reference about U-Center.
Click here for the U-Center manual.
References for updating ublox firmware:
- Click here for a reference about updating uBlox firmware.
- Click here for a another reference about updating uBlox firmware.
- Click here for one more refence about updating uBlox firmware.
The uBlox firmware has hundreds of parameters. Fortunately – the default parameters work fine when using the receiver as an RTK rover. I found it may be important to reset the firmware’s parameters to their defaults. In my tests, I found that simply loading new firmware does not reset all the parameters to their defaults. And parameters from previous firmware versions may have unpredictable results.
Click here for a reference about resetting firmware parameters to their defaults.
I ordered the TOP-106 dual band antenna and an antenna cable from sparkfun.com. There are calibration tables for this antenna in case I elect to use it in the future with a more advanced GNSS receiver.
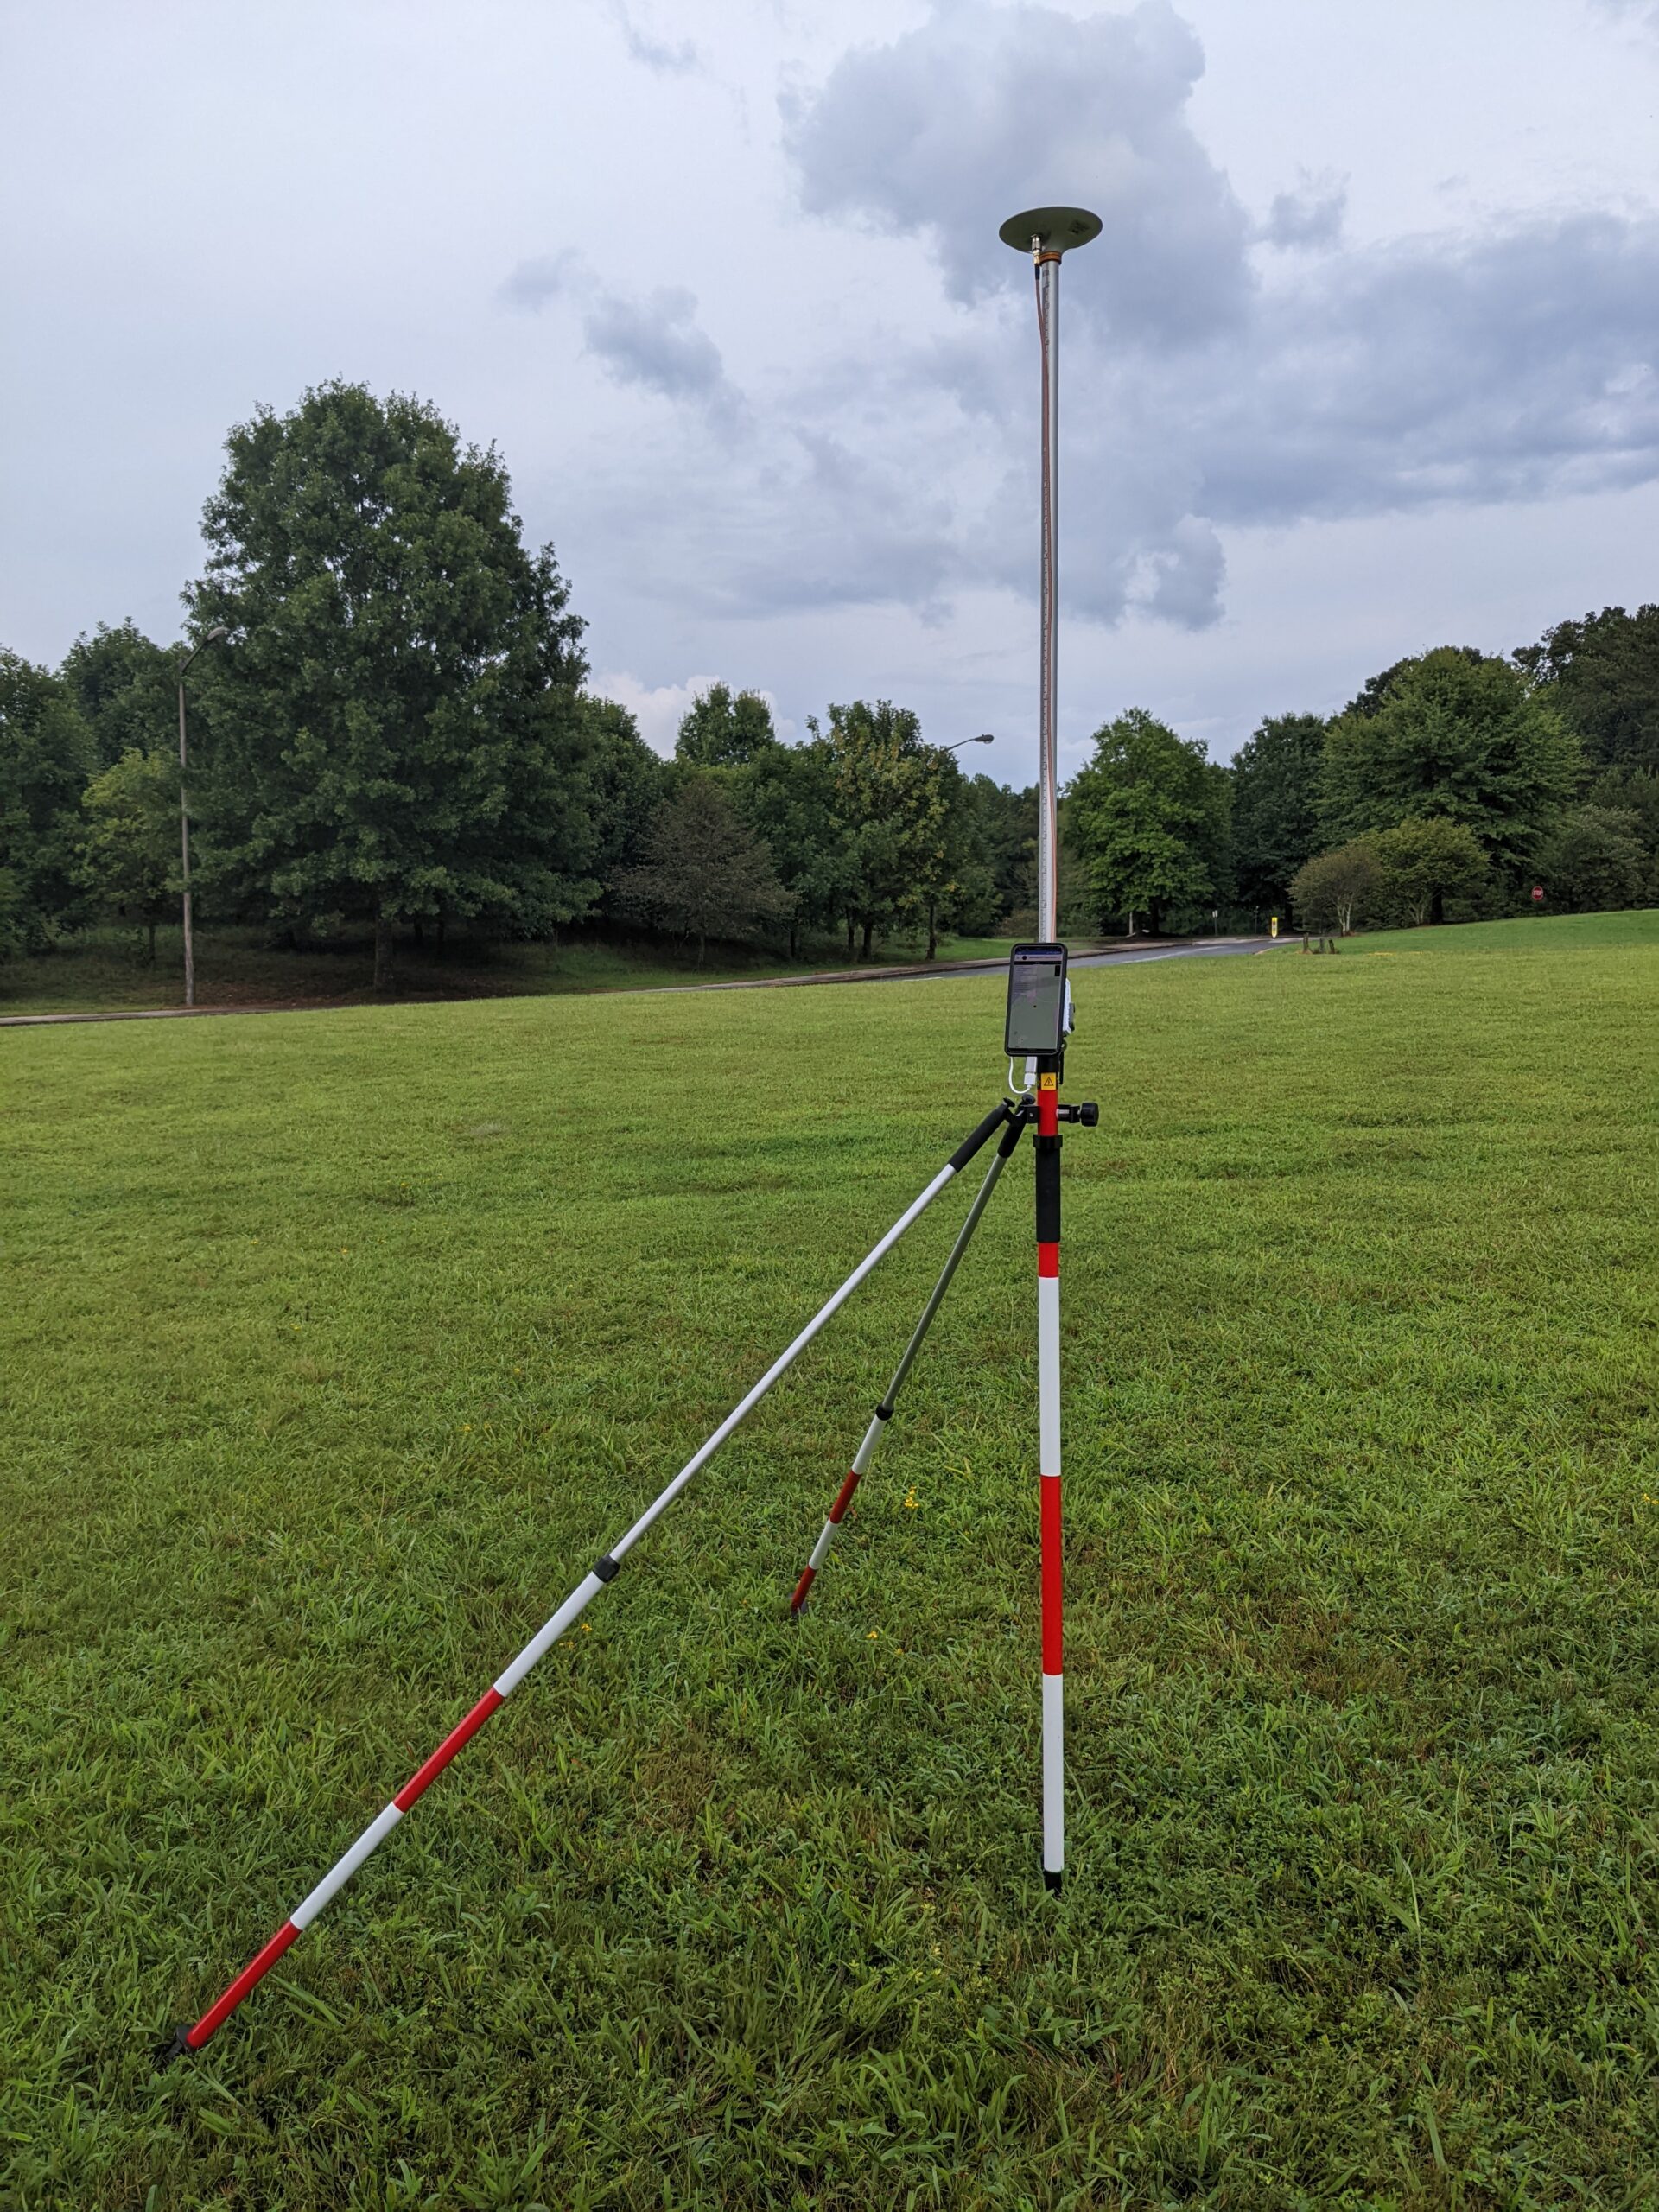
Amazon.com offered a basic prism pole and bi-pod for mounting the antenna at a reasonable price. I also bought a pole mounted cell-phone mount that holds both the receiver box and a cell phone. The cell phone is attached to the receiver box with Velcro.
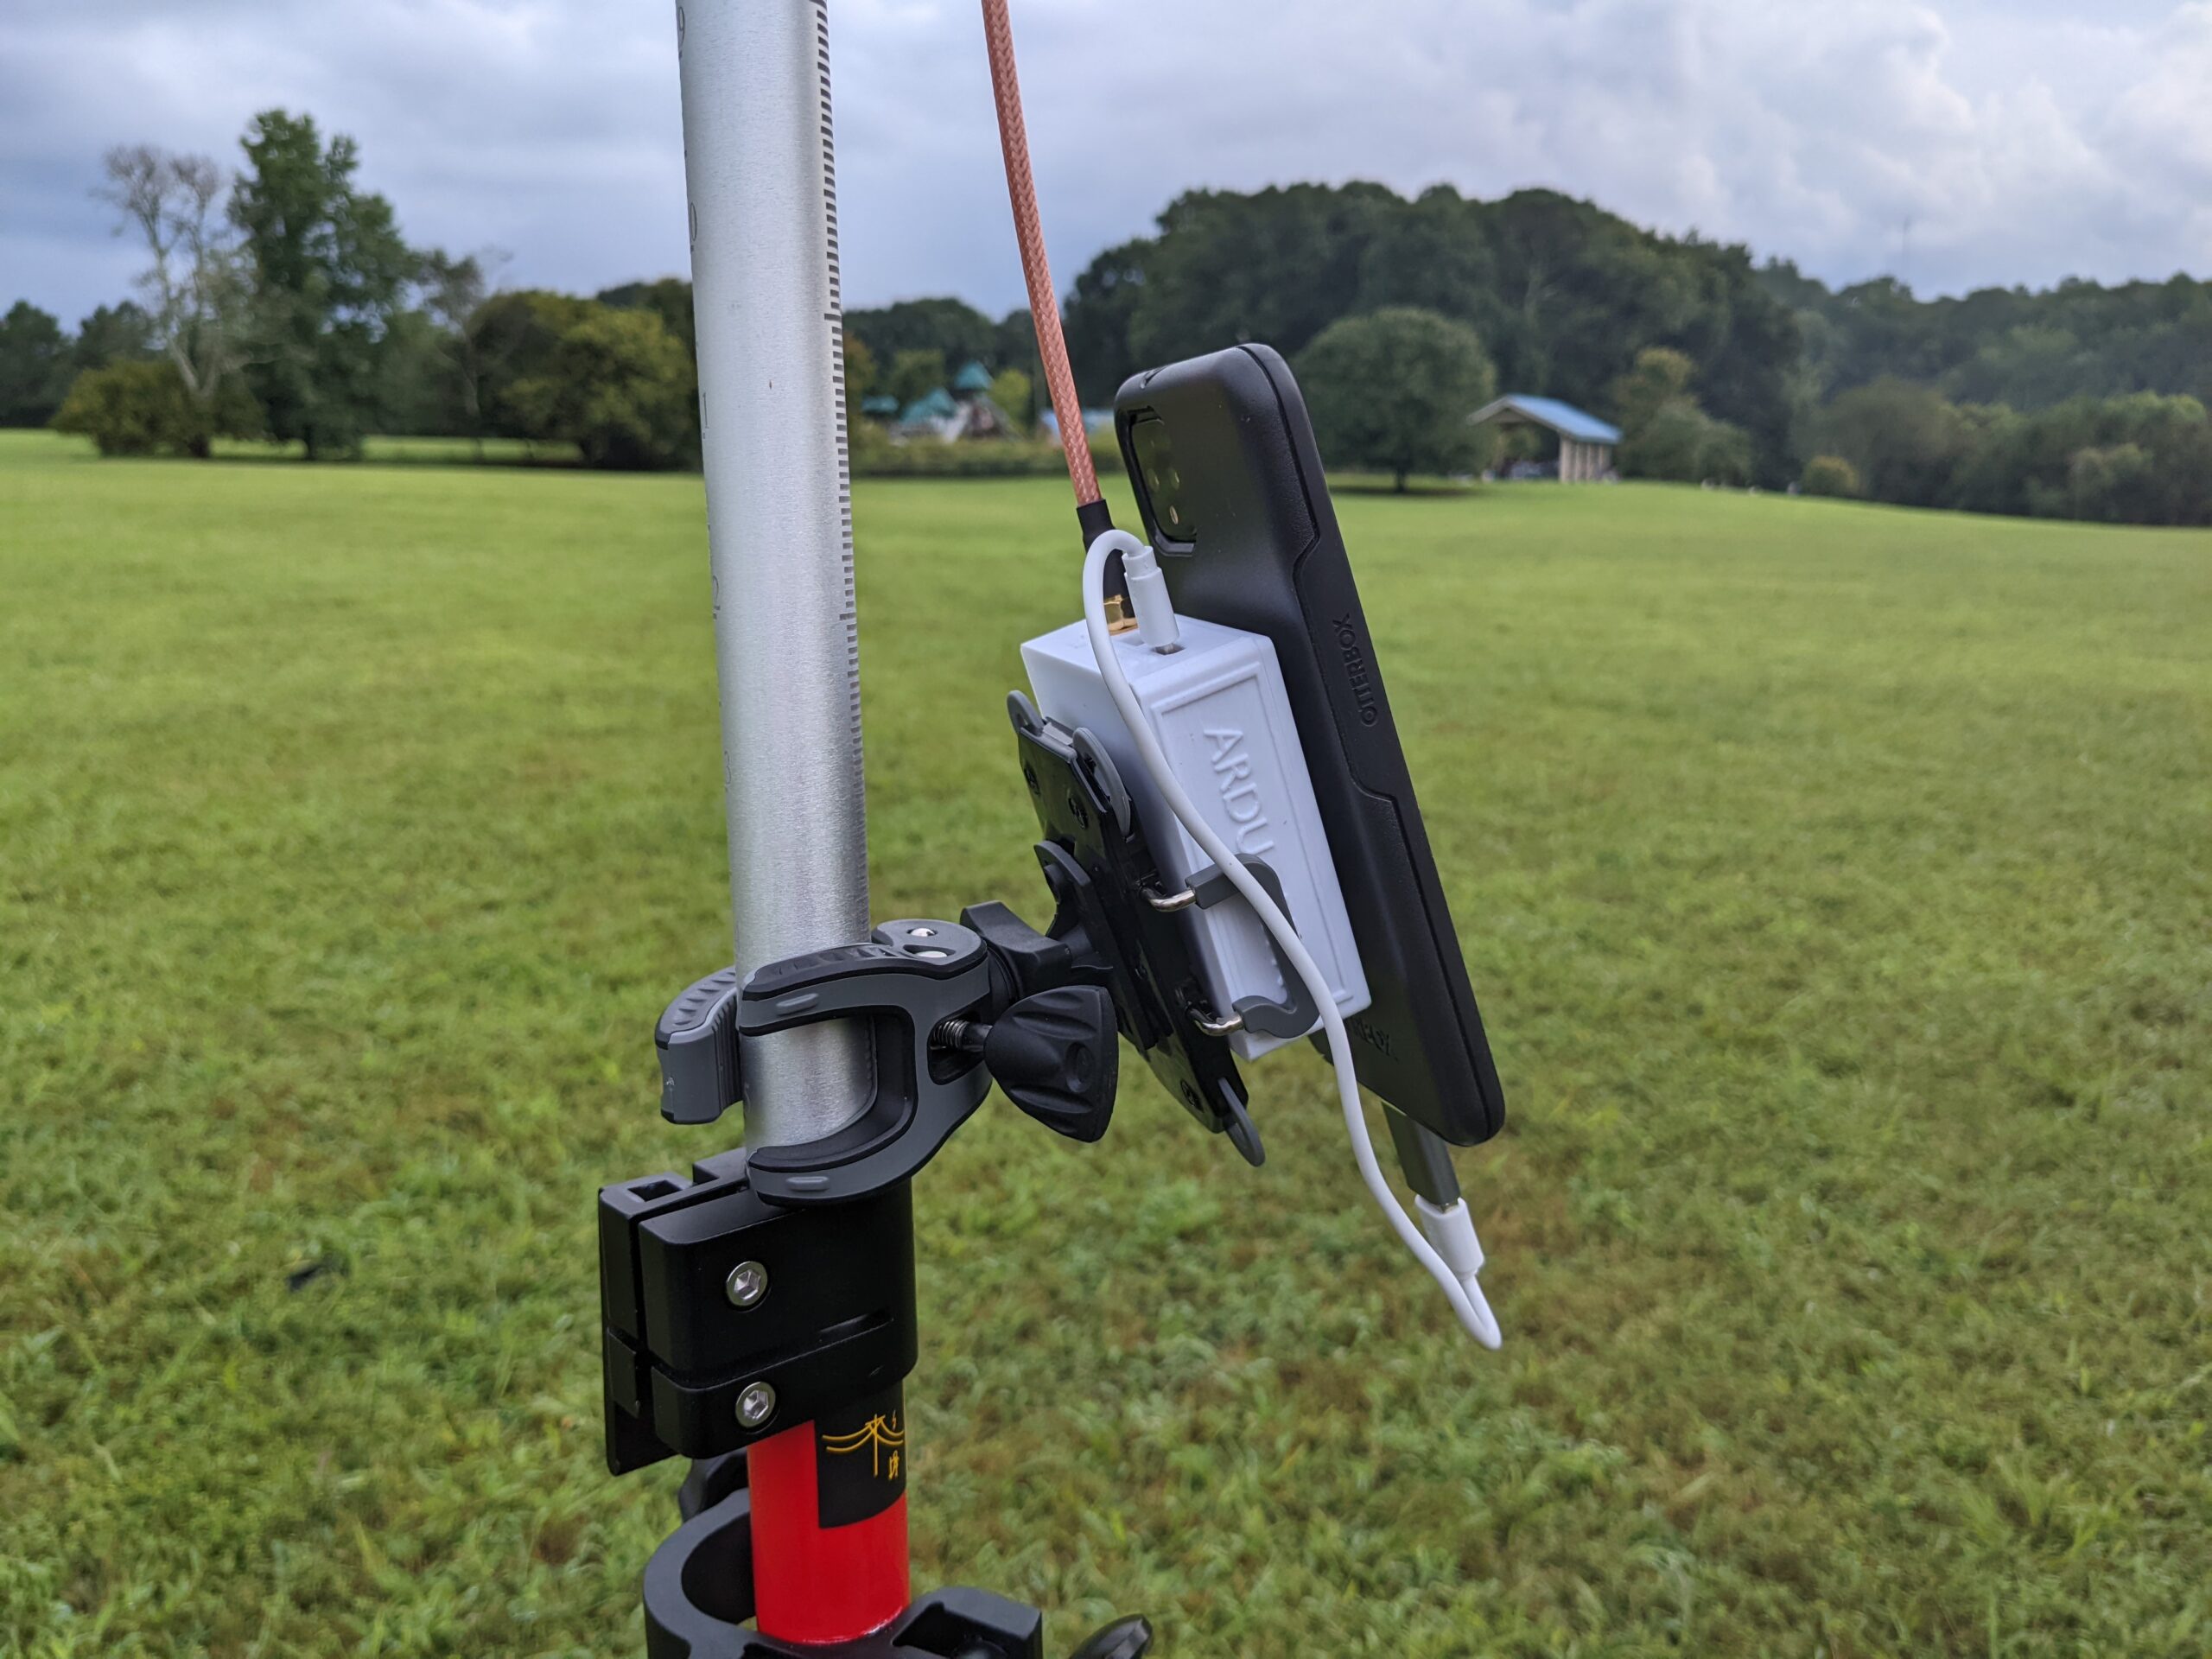
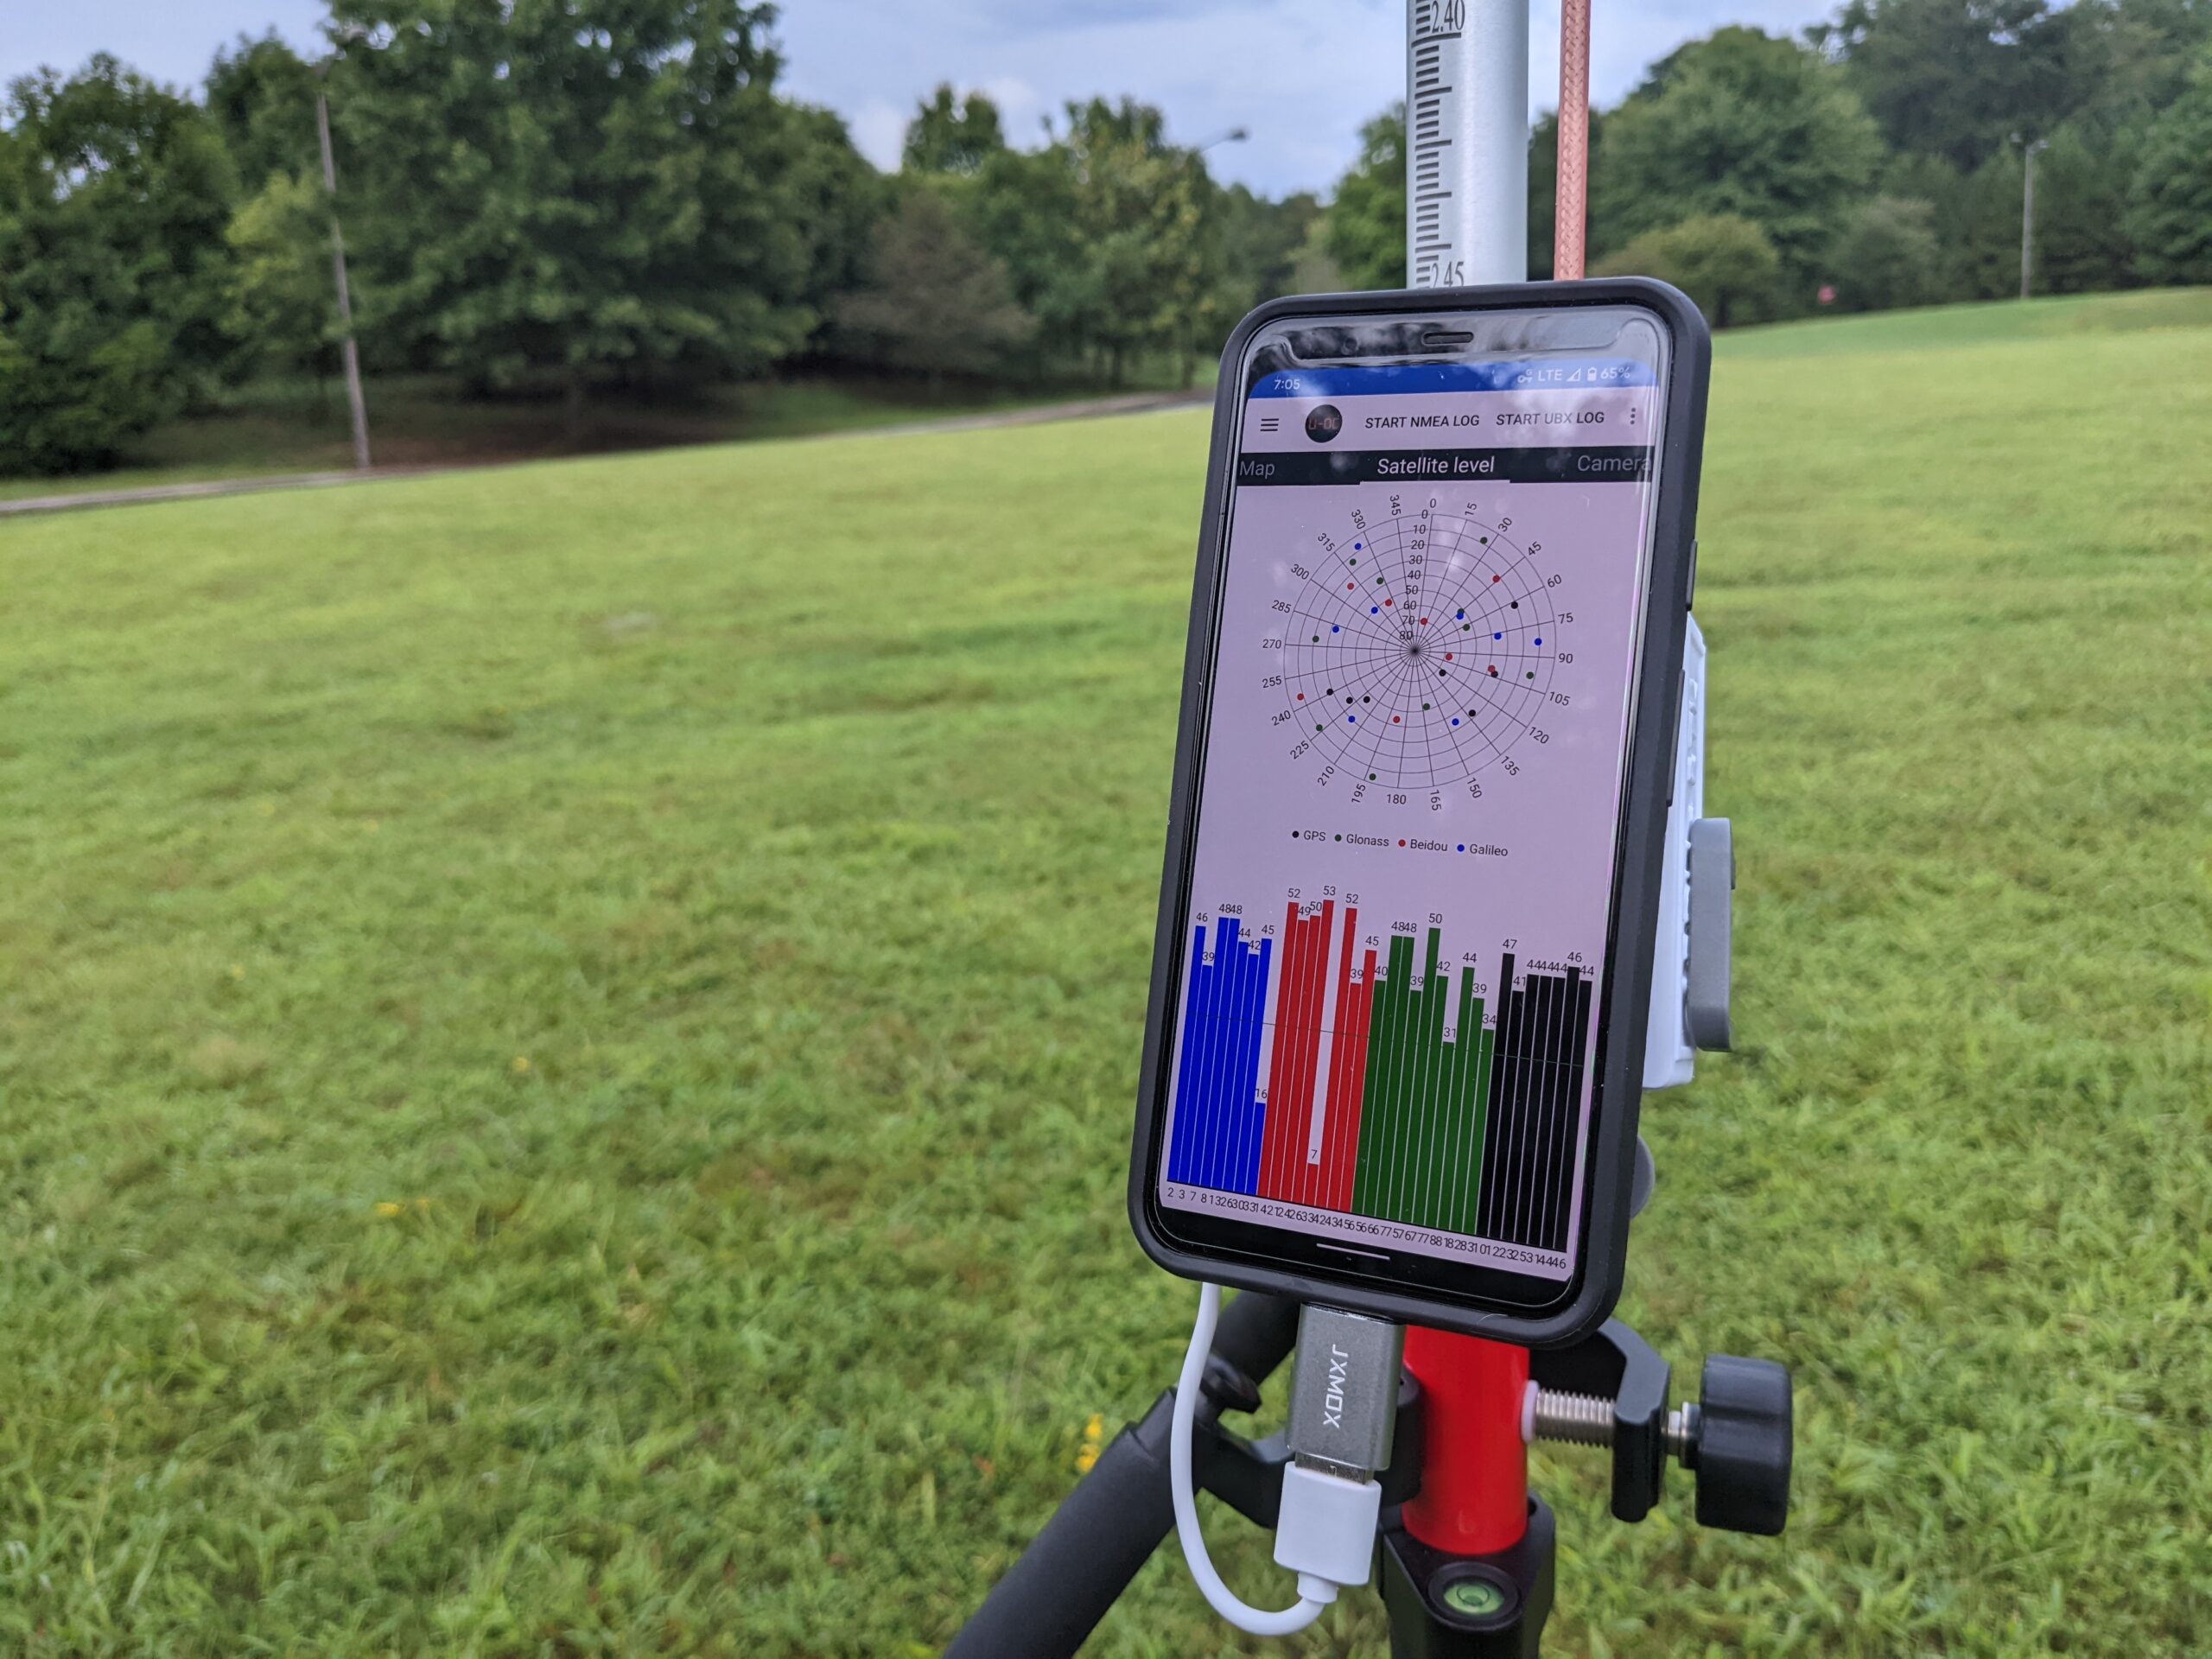
The USB OTG (On The Go) adapter allows the cell phone to power the GNSS receiver. The last step was to install an app on the cell phone that would display the the receiver’s data and connect with the Ntrip caster over the internet. I chose the U-Droid Center for u-Blox app. This app also allows saving RINEX files for PPK processing. I haven’t explored that.

The last step is getting the position data back at the office to be entered into my photogrammetry software. This was easy by associating my phone with my company google user ID. I set the phone to automatically sync photos – so by doing a screen-capture, the image was both on my phone and on my google photos page back in the office.
